Quick answer
Path first: reliable grasp faces → gripper; flat sealable surface → vacuum; profile locate / rare changeover → fixture (optionally plus grip or vacuum)
Decision table: match surface, side access, takt, drop risk, and compliance before brand shopping
TCP ledger: gripper / cup / adapter / harness mass and stick-out enter payload and reach → Payload guide · Reach guide
Takt: jaw open / close or vacuum build / vent must sit in cycle time → Cycle time guide
Interface and safety: flange, tool I/O count, who wires valves, and fingertip force / contact geometry on one page → Safety & I/O guide
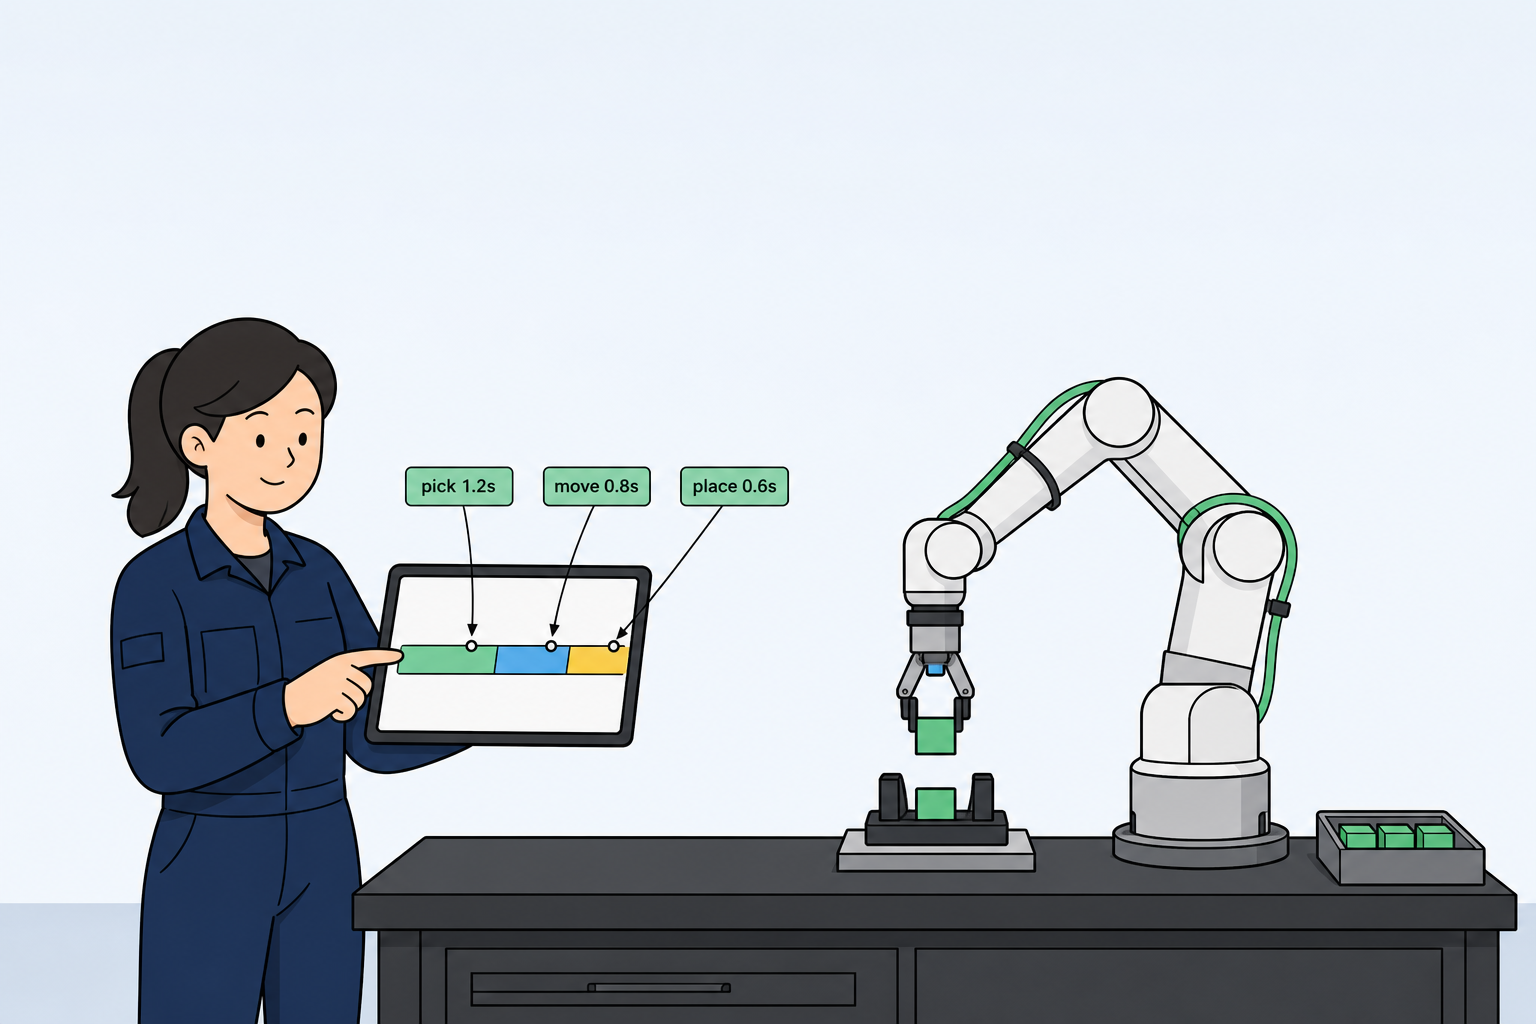
Day one of commissioning: the arm and comparison table cleared. Two centimeters above the tray, a round bottle slips—the contact arc is short and clamp force cannot safely spike without crushing the wall. Someone still points at “5 kg” on the datasheet. What usually failed is not buying too small an arm. It is ordering the hand before the part chose the path. Below: three paths, one decision table, two worked examples, plus TCP mass, flange I/O, and fingertip safety for the RFQ attachment.
What a cobot end effector (EOAT) is
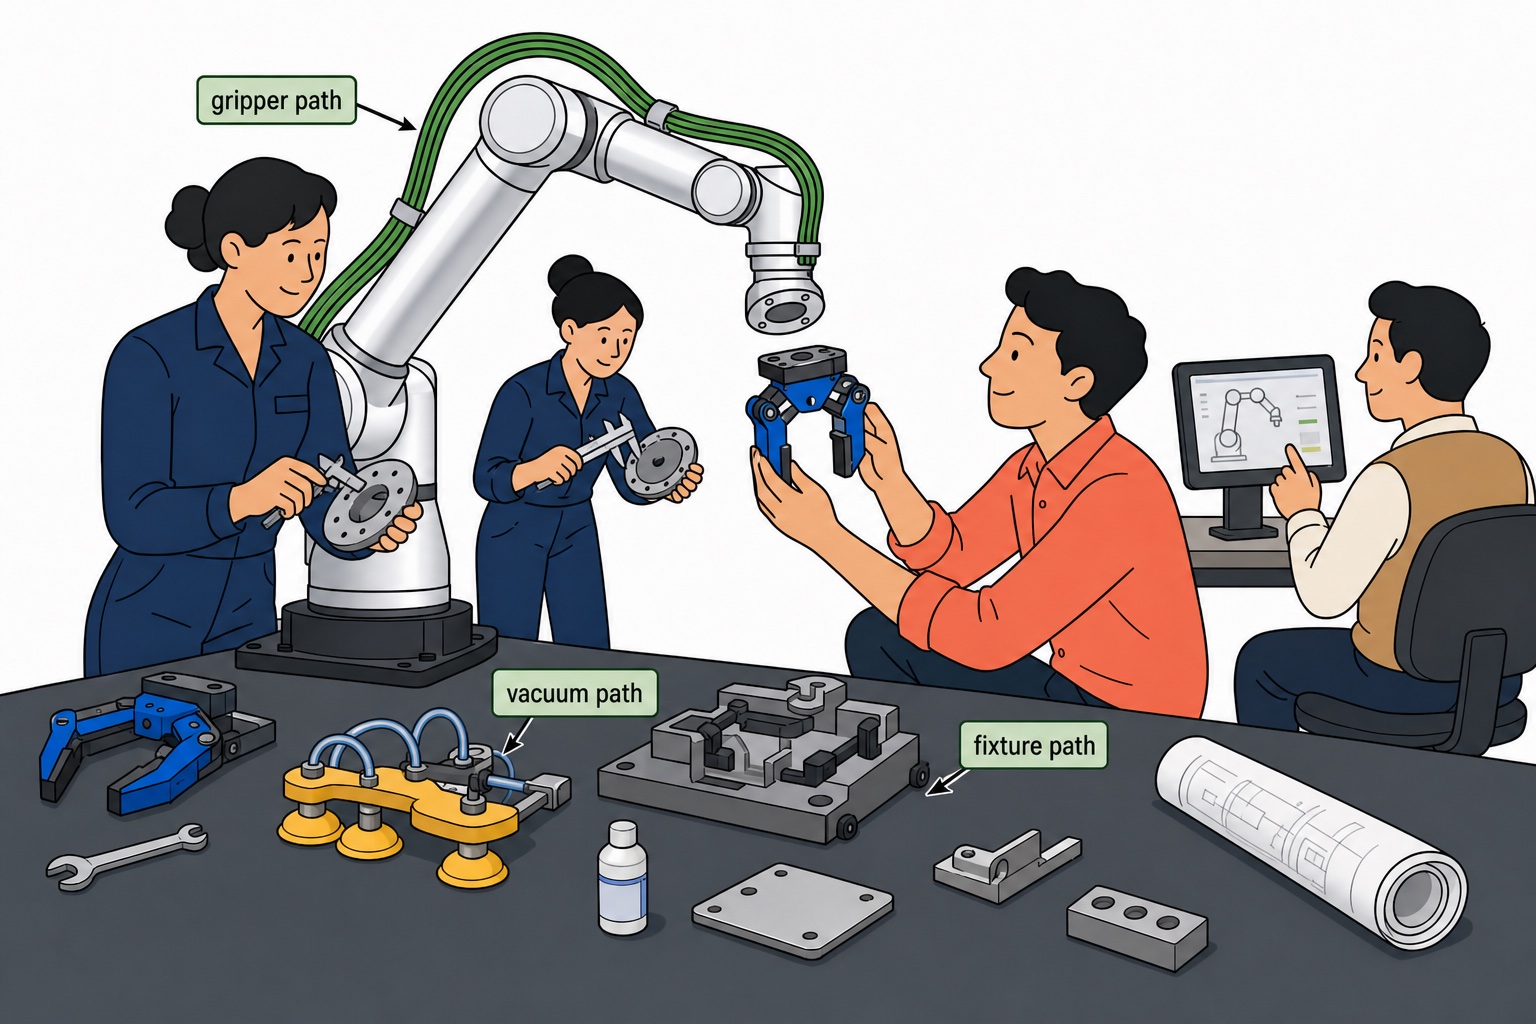
EOAT is the last interface between the task and the wrist flange: grippers, vacuum cups and valves, adapter plates, custom nests, sensors, and external dress. Olympus Controls on vacuum vs mechanical grippers treats path choice as the first cycle-time and capability decision; Ocean Player’s gripper types guide notes that tool mass consumes a large share of rated payload before the part lifts. Wrong path, and payload, reach, takt, and safety reassessment fail together.
Three paths: gripper / vacuum / fixture
| Path | Fits | Why teams pick it | How to judge clear | Failure mode |
|---|---|---|---|---|
| Mechanical gripper | Edges, shafts, bosses, positive hold | Controllable force, low drop risk | Contact length enough, force safe for the part, open/close in takt | Slippery rounds; fingertip force vs shared workspace |
| Vacuum | Flat sealable, top-only access, speed | Short stroke, fewer finger changeovers | Seal holds; build / vent fits budget | Porous / oily leak; retry time eats takt |
| Custom fixture | Irregular nests, rare changeover | High locate repeatability | Profile retains; lead time OK; can still add grip / vacuum | Redesign cost; no stack interface for later upgrades |
Path matrix (one page before quote)
| Question | Lean gripper | Lean vacuum | Lean fixture |
|---|---|---|---|
| Surface | Edges / grasp faces | Flat and sealable | Nest locates shape |
| Side access | Needs side or wrap clamp | Top face enough | Tray already presents |
| Takt | Open / close fits budget | Build / vent fits budget | Changeover infrequent |
| Drop consequence | Needs positive hold | Vacuum sense + interlock OK | Profile retains |
| Compliance / clean | Tip materials / lube OK | Food / clean cups OK | Traceable materials |
| Payload headroom | Body + fingertips fit after subtract | Cup frame + valves fit | Nest + plates fit |
Decision rule: geometry and consequence first, path second—not brand first. Once the path is frozen, check standard hardware at EOAT accessories (grippers & fixtures); customize only when profile or compliance is tight.
Worked example 1: round bottle slip → vacuum clears
Part: 40 mm round plastic bottle, about 35 g, target 6 s/piece, tray half-open on the side.
| Option | EOAT segment | Drops | Effect on 6 s |
|---|---|---|---|
| Two-finger grip (short arc) | Open/close ~0.6 s total | Occasional slip in teach | Takt looks tight; quality unstable |
| 30 mm cup vacuum | Build ~0.7 s + vent ~0.3 s ≈ 1.0 s | Drops stop | ~0.4 s more EOAT time must return to the ledger |
Failure was contact arc and force, not “35 g too heavy.” After vacuum clears, the loop gains about 1.0 s of build / vent—the real EOAT time finally enters the book. Beat breakdown: Cycle time guide.
Worked example 2: carton vacuum vs side clamp
Medium corrugated carton, top sealable, side hand holes. Top vacuum: build about 0.8–1.2 s; warped boards can leak on one side. Side clamp holds better but open/close often 0.8–1.5 s, and the approach needs jaw-thickness clearance.
| Criterion | Lean vacuum | Lean side clamp / fixture |
|---|---|---|
| Stable top seal | Prefer vacuum | — |
| Soft / porous walls | — | Side clamp or nest + vacuum |
| Close human proximity, blunt contact preferred | Cups usually blunter | Tip material and force limits with safety |
| Farthest place corner | Shorter tool helps → Reach guide | Long-stroke jaws grow TCP |
Irregular bottles or case nests often need a fixture first, then stacked vacuum or grip—primary when changeover is rare and profile is tight.
TCP mass, flange I/O, and fingertip safety
Weigh everything past the flange once: gripper body, cup frame, adapters, valves, camera, harness. Published notes often put EOAT at about 30–70% of rated (Ocean Player’s payload math); catalog sums run 10–15% light. CoG offset derates further—long fingers and cantilevered cups are usual culprits. Mass OK but protective stops → Payload guide, not disabling protection.
Flange and tool I/O: open / close, grip seated, vacuum OK, vent, leak alarm—counts and voltage as RFQ lines. Quote “2 points” vs floor needing five inputs → Safety & I/O guide. Valve supply, wiring, and risk-file ownership sit on the same page as the path.
Fingertip geometry: clamp force, tip hardness, sharp edges, and particulate enter PFL discussion when people share the zone (ISO/TS 15066). Heavier, longer, or sharper tools change the contact picture. EOAT change = reassessment, not a spare-part swap.
EOAT tiers and standard-part entry (rough bands)
| Tier | Published tool mass band | Typical work | Roooll entry |
|---|---|---|---|
| Light grip / small vacuum | About 0.3–1.5 kg tooling | Small parts, lab, precision place | EOAT accessories · r-Lite / r-Core |
| Mid grip / multi-cup | About 1–4 kg tooling | Machine tending, packaging | Same · compare payload headroom |
| Heavy fixture / case vacuum | About 3–8 kg+ tooling | Cases, palletizing-class nests | Subtract load, then pick the arm |
Bands are shorthand; path + weighed TCP + open/close time win. Compare three models → Side-by-Side Comparison; unclear application → Product Advisor. Do not freeze tool length before layout → Workcell layout guide.
Cross-checks with payload, takt, and safety
| Cross | Question that must share one page | Guide |
|---|---|---|
| EOAT ↔ payload | Tool + heaviest part + margin still inside rated? CoG on the curve? | Payload guide |
| EOAT ↔ cycle | Open/close or build/vent in the loop? Retry budget for leaks? | Cycle time guide |
| EOAT ↔ safety | Tip force, sharpness, vacuum-drop interlock, who wires I/O? | Safety & I/O guide |
One page for your integrator
Part: size, material, unit weight, photo / sketch, slipperiest / most porous SKU
Motion: pick / place direction, stroke, target s / piece
Path bias: gripper / vacuum / fixture (or “TBD on site”)
TCP: catalog estimate + plan to re-weigh dressed tool; stick-out past flange
Interface: flange, DI / DO, air / power, valve ownership
Constraints: food / medical / clean, particulate, whether people share the zone
Attachments: layout sketch or CAD (same PDF as the Workcell layout guide)
Common sizing mistakes
| Mistake | Floor symptom | Fix |
|---|---|---|
| Arm before hand | First cycle slips or misses takt | Freeze path with the part |
| Peak grip / suction only | Demo OK, production leak or crush | Accept on worst surface + takt budget |
| Skip open/close or build/vent | Demo saves 1 s+, production slips | Put beats in the cycle sheet |
| Catalog mass, never re-weigh | Protective stops, margin gone | Weigh dressed tool + harness |
| Tip swap without safety review | EHS stop or PFL trips | Change triggers reassessment |
| Three different path stories | Quote mismatch | One decision page + comparison link |